


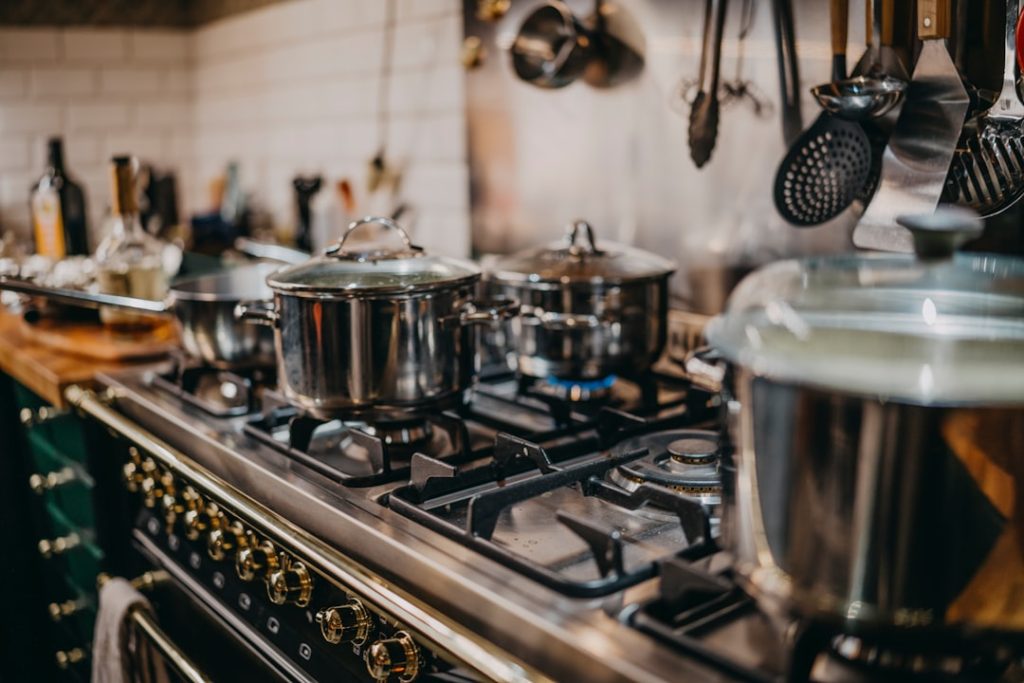
So, your gas stove burner’s flame looks a bit anemic? It’s not just annoying; it can make cooking a real pain. The good news is, for most low flame issues, you can probably fix it yourself without calling in a professional. Usually, it boils down to something simple: a dirty burner, restricted gas flow, or a minor adjustment.
Before we dive into fixing anything, it helps to know a little about how your burner works. It’s a pretty clever system, really.
The Anatomy of a Burner
- Burner Cap: This is the outermost, often black, piece that sits on top of the burner head. Its main job is to evenly distribute the flame.
- Burner Head (or Burner Base): This is the metal ring with small holes (ports) where the gas actually comes out and ignites.
- Igniter: The small porcelain or metal rod that sparks to light the gas.
- Orifice: This tiny hole in the gas manifold allows gas to flow into the burner. Its size is crucial for proper gas-to-air mixture.
- Venturi Tube: This is where gas mixes with air before reaching the burner ports. It’s often hidden beneath the cooktop.
When everything is working correctly, gas flows from the supply, through the orifice, mixes with air in the venturi tube, and then exits through the burner ports to create a strong, blue flame. A low flame means something in this chain isn’t quite right.
If you’re looking to improve your kitchen appliances further, you might find it helpful to read the article on how to increase the efficiency of your refrigerator. Understanding how to maintain your refrigerator can complement your efforts in fixing a low flame on your gas stove burner, as both appliances are essential for a well-functioning kitchen. For more information, check out the article here: How Do I Increase the Efficiency of My Refrigerator?.
Safety First: Before You Start
This isn’t just a friendly suggestion; it’s essential. Working with gas appliances requires a bit of caution.
Shut Off the Gas Supply
- At the stove: Most gas ranges have a shut-off valve behind them. It’s usually a yellow or red handle, parallel to the gas line when open, perpendicular when closed.
- At the main: If you can’t find a valve at the stove, shut off the main gas supply to your house. This is less convenient but necessary if you can’t locate the stove’s valve.
Let Things Cool Down
Don’t start tinkering with a hot stove. Give it plenty of time to cool completely to avoid burns.
Open a Window
Ensure good ventilation. While minor gas leaks usually dissipate quickly, it’s always better to have fresh air circulating.
Common Causes and Their Fixes
Okay, now let’s get into the nitty-gritty of what’s probably causing your low flame.
1. Clogged Burner Ports or Spills
This is, by far, the most common culprit. Food debris, grease, or cleaning product residue can block the tiny holes where the gas exits.
What to Look For
- Visible Debris: Lift off the burner grates and caps. Do you see food bits, grease, or crusty residue around the burner head ports?
- Uneven Flame: Even if the flame isn’t super low, if it’s sputtering or uneven, it’s a strong indicator of clogged ports.
The Fix: Clean the Burner Components
- Remove Burner Parts: Take off the grates, burner caps, and the burner heads themselves. You might need to gently lift them straight up.
- Soak in Soapy Water: Fill a sink or basin with warm, soapy water. Dish soap works fine. Let the burner caps and heads soak for at least 30 minutes, or longer if they’re particularly grimy. This helps loosen baked-on gunk.
- Scrub Away Gunk: Use a non-abrasive scrub brush, an old toothbrush, or a scouring pad to clean off any softened debris. Pay close attention to the small gas ports.
- Clear the Ports Thoroughly: This is critical. For stubborn clogs, use a straightened paperclip, a sewing needle, or a specialized burner port cleaner (you can often find these in stove cleaning kits). Carefully poke through each and every port to ensure it’s completely clear. Be gentle; you don’t want to enlarge the holes.
- Rinse and Dry Completely: Rinse all components thoroughly to remove all soap residue. Then, and this is important, dry them completely. Moisture can interfere with ignition and even cause rusting. You can let them air dry, or use a towel. Some people like to place them in a low oven for a few minutes (after it’s been turned off and is just warm, not hot) to ensure bone-dryness.
Reassembly
Once everything is sparkling clean and dry, reassemble the burner parts. Make sure the burner head is seated properly over the igniter and the burner cap is correctly aligned. Incorrect alignment can also lead to an uneven or weak flame.
2. Misaligned Burner Cap
A simple fix, but often overlooked. If the burner cap isn’t sitting correctly, it can restrict gas flow or cause an improper mix of air and gas.
What to Look For
- Wobbling Cap: Does the burner cap feel loose or wobble when you touch it?
- Offset Cap: Is it clearly not perfectly centered over the burner head?
The Fix: Realign the Cap
- Lift and Reseat: Simply lift the burner cap straight up and place it back down, ensuring it sits flat and snugly on the burner head. Most burner caps have specific notches or tabs that align with corresponding features on the burner head; make sure these are correctly engaged.
3. Problems with the Orifice (Spud)
The orifice is a tiny, often brass, component located where the gas enters the burner assembly. Its small hole controls the amount of gas flowing into the burner. If it’s clogged or damaged, your flame will suffer.
What to Look For
- No Visible Flame: If cleaning the burner parts didn’t help, and you have no flame at all, or a very weak one, a clogged orifice might be the issue.
- Consistent Issue Across All Burners: If all burners have a low flame, it’s less likely to be an individual orifice, but if it’s just one, it’s a strong suspect.
The Fix: Clean or Inspect the Orifice
Important: This step requires more care and potentially some disassembly of your cooktop. If you’re not comfortable, consider calling a professional.
- Access the Orifice: You’ll usually need to remove the burner head to get to the orifice. In some stove designs, you might need to lift the cooktop itself. Consult your stove’s manual for specific instructions on accessing the orifice. The orifice is usually a small, brass, hexagonal nut that the gas tube connects to.
- Inspect and Clear (Carefully):
- Visually Inspect: Is there any visible debris clogging the tiny hole in the center of the orifice?
- Use a Fine Wire: Very carefully, use a thin, stiff wire (like a guitar string, a very fine paperclip, or a specialized tool) to gently poke into the orifice hole. Do NOT use a drill bit or anything that could enlarge the hole. Enlarging the hole will deliver too much gas, creating a larger-than-normal flame, which can be dangerous. The goal is to clear a blockage, not modify the hole.
- Avoid Liquids: Do not use water or any other liquids to clean the orifice while it’s in place.
- Reassemble: Once you’ve cleared any blockage, reassemble everything, ensuring all connections are secure.
When to Suspect a Damaged Orifice
If you’ve recently converted your stove from natural gas to propane (or vice-versa) and the flame is consistently low, it’s possible that the wrong size orifices were installed, or they weren’t adjusted correctly. In this case, you’ll need the correct orifices for your gas type and professional assistance if you’re unsure.
4. Gas Supply Issues
Sometimes, the problem isn’t with the burner itself, but with the amount of gas actually reaching it.
What to Look For
- Low Flame on All Burners: If all your burners are struggling with a low flame at the same time, this points strongly to a gas supply issue.
- Other Gas Appliances Affected: Is your water heater or furnace also experiencing issues? This could indicate a broader problem.
- Recent Work: Have you had any recent gas line work done in your home or street?
The Fix: Check Gas Valves and Pressure
- Stove Shut-Off Valve: Double-check the shut-off valve behind your stove. Is it fully open? Sometimes they get partially closed by accident or during cleaning. Make sure the handle is parallel to the gas line.
- Main Gas Supply Valve: Confirm your home’s main gas supply valve is fully open.
- Gas Pressure Regulator (Rare, Professional Only): Gas stoves have a pressure regulator, usually located near where the gas line connects to the stove. If this regulator is faulty, it can restrict gas flow. Do NOT attempt to adjust or fix this yourself unless you are a qualified professional. This is a job for a licensed gas technician. If you suspect a regulator issue, it’s time to call for help.
5. Air Shutter Adjustment (Less Common for Low Flame, More for Flame Color)
While less common for just a low flame (it usually affects flame color more), an improperly adjusted air shutter can impact combustion efficiency, which in turn can make the flame appear weaker.
What to Look For
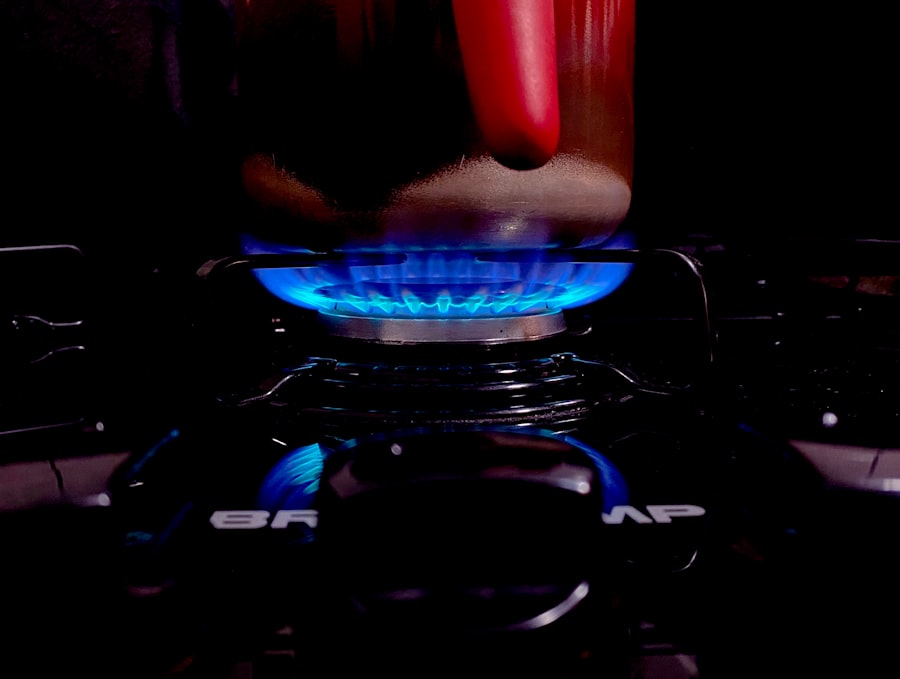
- Orange or Yellow Flame: If your low flame is also very orange or yellow (instead of blue), it indicates too much air or improper gas-to-air mixture, and the air shutter might be the culprit. A perfectly blue flame indicates good combustion.
The Fix: Adjust the Air Shutter
Note: Not all gas ranges have user-adjustable air shutters for every burner. Some are fixed. Refer to your stove’s manual.
- Locate the Air Shutter: The air shutter is usually a metal band or collar located on the venturi tube, just below where the gas enters the burner from the orifice. You might need to lift the cooktop to access it.
- Loosen and Adjust: There will usually be a small screw that holds the shutter in place. Loosen this screw slightly.
- Adjust Gradually: With the burner lit (carefully!), slowly rotate the air shutter to open or close it. You’re aiming for a strong, steady, blue flame with minimal yellow or orange tips.
- Too much air: Flame might lift off the burner or be noisy.
- Too little air: Flame will be lazy, yellow/orange, and might produce soot.
- Tighten: Once you’ve achieved a good flame, tighten the screw to secure the shutter in place.
- Turn off the gas when you’re done or if you need to take frequent breaks for safety.
Col-Tech Appliance Repair Service Map Location is where you can find the exact location of our repair service.
When to Call a Professional
While many low flame issues are DIY-friendly, some situations warrant calling in a licensed technician.
- Persistent Gas Odor: If you smell gas at any point, immediately shut off the gas supply, open windows, and call your gas company or a professional. This is a serious safety concern.
- No Improvement After Troubleshooting: If you’ve tried all the common fixes and your flame is still weak, it’s time for an expert diagnosis.
- Suspected Gas Leak: Again, gas smell = call a pro.
- Complex Disassembly Required: If your stove requires significant disassembly that you’re not comfortable with, don’t force it.
- Regulator or Main Line Issues: These are definitely not DIY jobs.
- Warranty Concerns: If your stove is still under warranty, attempting repairs yourself might void it. Check your manufacturer’s warranty information first.
If you’re experiencing issues with a low flame on your gas stove burner, you might also find it helpful to read about how to deal with hot spots in your kitchen oven. This related article provides insights that can enhance your cooking experience by ensuring even heat distribution, which is crucial for achieving the best results in your meals. You can check it out here: how to deal with hot spots in your kitchen oven.
Maintenance to Prevent Future Issues
| Issue | Possible Cause | Solution |
|---|---|---|
| Low Flame | Clogged burner holes | Clean burner holes with a needle or pin |
| Low Flame | Gas supply issue | Check gas supply and regulator |
| Low Flame | Dirty burner components | Clean burner components with soapy water |
A little bit of regular care can go a long way in keeping your stove running strong.
- Wipe Up Spills Immediately: Don’t let food dry and harden around your burners.
- Regular Burner Cleaning: Make it a habit to remove burner caps and heads for a quick wash and port check every few months, or more often if you cook frequently.
- Use Proper Cleaner: Avoid harsh, abrasive cleaners that could damage burner components. Mild dish soap and warm water are usually all you need.
- Ensure Dryness: Always make sure all burner parts are completely dry before reassembly.
Hopefully, with these steps, you can get your gas stove burner back to its full, powerful, blue-flamed glory! Happy cooking!
FAQs
1. What are the common reasons for a low flame on a gas stove burner?
Some common reasons for a low flame on a gas stove burner include a clogged burner orifice, a dirty burner, low gas pressure, or a faulty regulator.
2. How can I clean a clogged burner orifice to fix a low flame on a gas stove burner?
To clean a clogged burner orifice, you can use a small wire or needle to carefully remove any debris that may be blocking the orifice. Be sure to turn off the gas and disconnect the burner before attempting to clean the orifice.
3. What steps can I take to clean a dirty burner and improve the flame on a gas stove burner?
To clean a dirty burner, you can remove the burner cap and use a soft brush or cloth to clean any debris or residue. Be sure to allow the burner to completely dry before reassembling and using it again.
4. How can I check and adjust the gas pressure to fix a low flame on a gas stove burner?
You can check the gas pressure by using a manometer, which measures the pressure of the gas. If the pressure is low, you may need to adjust the regulator or contact a professional to help with the adjustment.
5. When should I consider contacting a professional to fix a low flame on a gas stove burner?
If you have tried cleaning the burner and orifice, checking the gas pressure, and adjusting the regulator, but still have a low flame, it may be best to contact a professional to diagnose and fix the issue. Additionally, if you are uncomfortable working with gas appliances, it is always best to seek professional help.


